I've added a mailing list feature to my website . Every week I will send out a robotics bulleting . It will include updates to my website ,a robotics related article, a list of cool robots that people built, and some links to interesting robotics related websites that I found.
To join this mailing list sign up with the forum on the upper right side of this blog.
,Eric
Friday, July 11, 2008
Video of Chives , My Butler Robot Version 2
VOTE FOR MY BUTLER ROBOT IN THE INSTRUCTABLES CONTEST!
http://www.instructables.com/id/Build-Your-Own-Butler-Robot/
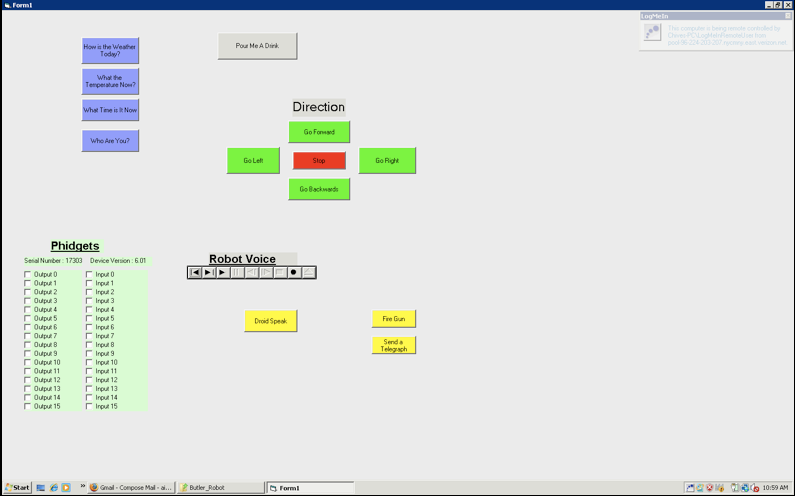
My Butler Robot: The Software
The software that Chives runs off was created in Visual Basic 6 and makes heavy use of Microsoft Vista's Speech Recognition Tool.
The minimum laptop requirements for the butler robot are as follows:
1. Runs any version of Windows Vista
2. At least 512 MB RAM
3. Two USB ports
4. Wifi Adapter ( Built-in or USB)
5. Speakers (Built-in or USB)
You will need to install/ setup the following programs and drivers:
1. Microsoft Visual Basic 6 ( if you want to edit and run the butler robot's program)
or if you want to only run the butler robot's install this runtime filesoftwareinstall this runtime file
2. Setup Microsoft Vista Speech Recognition
3. CCRP Timer Object
4. Phidgets 21 Installer Package
5. Free Voip Calling from Robot
6. RoboRealm

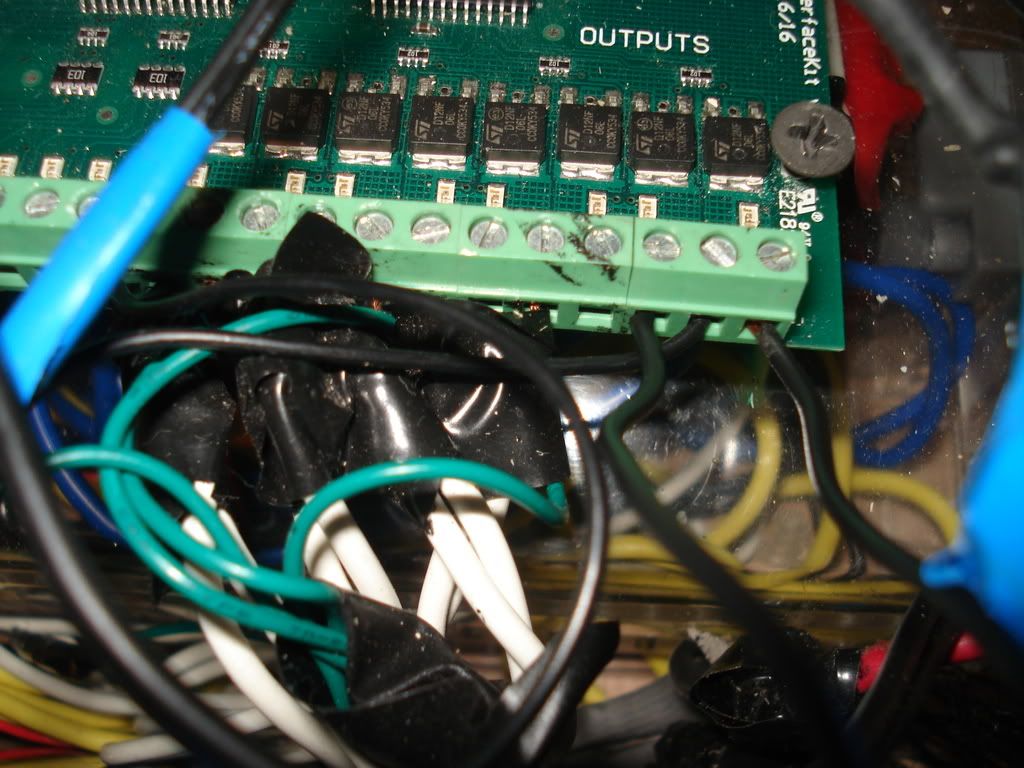
Verify Connections
After installing everything verify that the Phidgets Interface Kit Outputs are connected to their appropriate components. If something is wrong then just make the proper connections.
Output(0) = Relay for Left Motor to turn forward
Output(1)= Relay for left motor to turn in reverse
Output(2) = Relay for right motor to turn forward
Output(3) = Relay for right motor to turn in reverse
Output(6) = Left arm motor
Output(7) = Right arm motor
Output(9)= Bottle Cap Opener motor
Output(10)= Bottle tilter
Output(15) = Gripper Motor

Downloading the Code
The code can be downloaded from this page . Just download it and unzip.
http://www.instructables.com/files/orig/F01/57FK/FIHVKCYW/F0157FKFIHVKCYW.zip
This is version 1 of the code. Look on my blog ( eRobots.BlogSpot.com) for the most updated version.
This code has the following features:
Voice Control Over the Following:
1. Drive in all four directions - distance in "units"
2. Speak the Current Time
3. Speak the Temperature in Your Area
4. Speak the Weather Conditions
5. Pour a Drink
6. Raise Right Arm
7. Raise Left Arm
8. Close gripper
9. Various Sound Effects ( gun shot , load gun , laugh , etc.)
Text to Speech Warning of the Following:
1. No internet connection
2. Low Battery
3. Being Remote Server Operated now
This code is a stable release . My program with Voip and Roborealm interface has some bugs , so I'll only release that when I get all those bugs worked out.
To run my program do the following. Launch Vista Speech recognition and get it out of sleep mode and have it listen. Then launch my program . Now speak the commands and Vista Speech will click the commands that are in my program.
In the next few tutorials I will be explaining parts of the code so that you will be able to edit it to your liking.
Explanation of Subroutines and FunctionsI have included in the code a lot of subroutines and functions to make the code easier to use and easier to understand .
Here is a list of the major subroutines and functions
1. Speak
The Speak subroutine will play the sound file which is specified . All sound files must be in the "Voice" folder in order to play.
The syntax for the Speak subroutine is : Speak (filename as String)
ex: Speak "File1" - this will play the sound file "File1.wav" which is in the folder "Voice"
Note: For variables such as weather conditions make sure that the proper sound file exists for the condition.
2. Pause
The Pause subroutine will as it's name implies pause the code for a certain amount of milliseconds.The Pause function uses the Sleep function( a Win32 function) , but before sleeping it makes sure that all prior commands were fully completed.
Syntax for the Pause subroutine is : Pause (milliseconds as Integer)
ex: Pause 2000 - this will sleep for 2000 milliseconds a.k.a 2 seconds
3. Drive
The Drive subroutine is responsible for controlling the drive motors. The subroutine requires two variables to be filled in order to work. The two variables that it relies on are strDriveDirection and strUnits. strDriveDirection is a public variable because that way the direction can be set separately and in a different procedure than strUnits.
strDriveDirection tells the subroutine which drive relays to activate and strUnits tells the subroutine how long to activate the relays.
Syntax for the Drive subroutine is:
strDirection = (direction as String)
Drive (milliseconds as Integer)
ex: strDirection = "Forward" ' set the Direction to forward
Drive 3000 'Drives for 3000 milliseconds or 3 seconds
4. Get_Time
The Get_Time public subroutine returns the current time in a variety of variables. It has the ability to separate the time into the singles and tens place, set the time to 12 hour time, divide the day into AM and PM, and even divide the day into day phases(e.g. afternoon).
The syntax for it is either Get_Time or Call Get_Time
It returns the following public variables:
strDayDivider - this is either AM or PM
strHours - the amount of hours in 12 hour time ( maximum is 12)
strRawHours- the amount of hours in 24 hour time ( maximum is 24)
strRawMinutes- the amount of minutes ( double digit)
strSinglesMinutes- the amount of minutes in the singles place only ( single digit)
strTensMinutes- the amount of minutes in the tens place only ( e.g. 30 , 40 , 50 )
strDayPhase - either "Morning" , "Afternoon", or "Night"
5. Get_Weather_Info
Gets the weather information( temperature and conditions) and returns public variables.
The syntax is either Get_Weather_Info or Call Get_Weather_Info
It returns the following public varables:
strTemperature - temperature in degrees farenheit ( double digit)
strDegrees_Singles - temperature in the singles place only ( single digit)
strDegrees_Tens - temperature in the tens place onle ( e.g. 10 , 20 , 30 , 40)
strFeels_Like - feels like temperature in degrees farenheit ( double digit)
strFeels_Like_Singles - feels like temperature in the singles place only (single digit)
strFeels_Like_Tens - feels like temperature in the tens place only (e.g. 10, 20 ,30)
strWeather_Conditions - the weather conditions outside ( can be anything from herehere )
There are many other minor subroutines and functions , but the average user will not need to use them .
6. HighOutput
This subroutine sets the assigned port number a logical high or on.
syntax HighOutput(portnumber as integer)
ex: HighOutput (9) - Turns on Output 9 of the Phidgets
7. LowOutput
This subroutine sets the assigned port number a logical low or off
syntax LowOutput(3) - Turns off Output 3 of the Phidgets
Monday, July 7, 2008
VOTE FOR MY BUTLER ROBOT!!!
I entered Chives into the Instructables Robot Contest.
I made an extremely detailed tutorial on him so that anyone can build their own butler robot.
To vote for Chives you need an instructables account
If you have an account already then go to the link below
http://www.instructables.com/contest/robotcontest/?show=ENTRIES&sort=USERVOTES
Then look for the post titled Build Your Own Butler Robot. Then click the Vote button underneath it. After this just click the picture of the butler robot to see the entire tutorial
Please vote for mine only , because if you vote for someone elses also then your vote by me is negligible.
Thanks!
,Eric
Wednesday, July 2, 2008
My Butler Robot: Building the Robot Arms
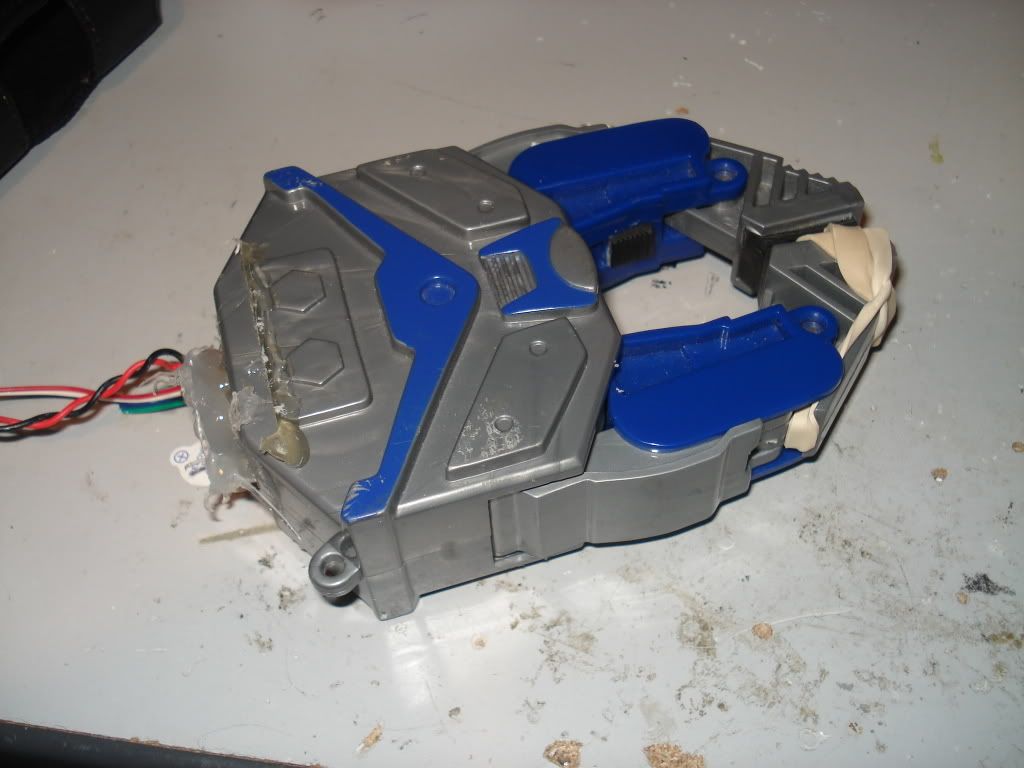
The robot arms will consist of a gripper and an arm which makes 90 degree revolutions.
The gripper that I used came from one of those robot grabber toys.

You will also need the following PVC parts , I believe one is called a threaded PVC connector and the other is a 2" length pipe with a piece of plastic sticking out in the back.
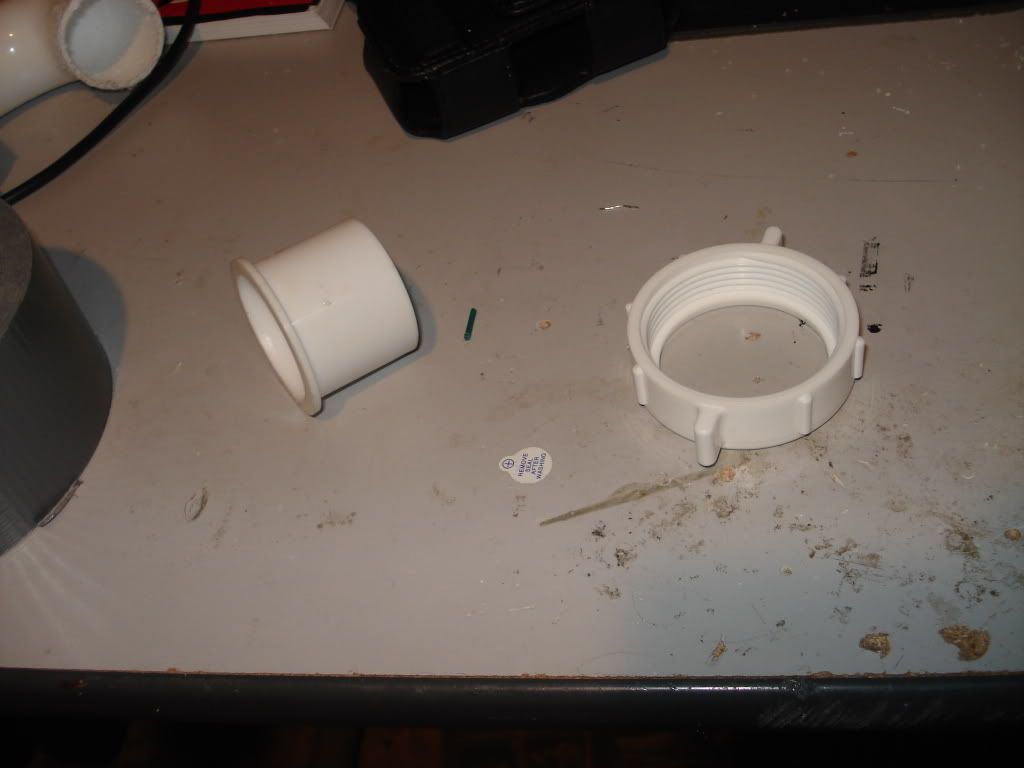
Put the threaded connector over the pipe piece and connect the end of that pipe to the gripper. Hot glue the end of the pipe to the gripper.

Now take any piece of PVC pipe that is threaded on the end and cut the pipe around three inches from where the threaded part begins.
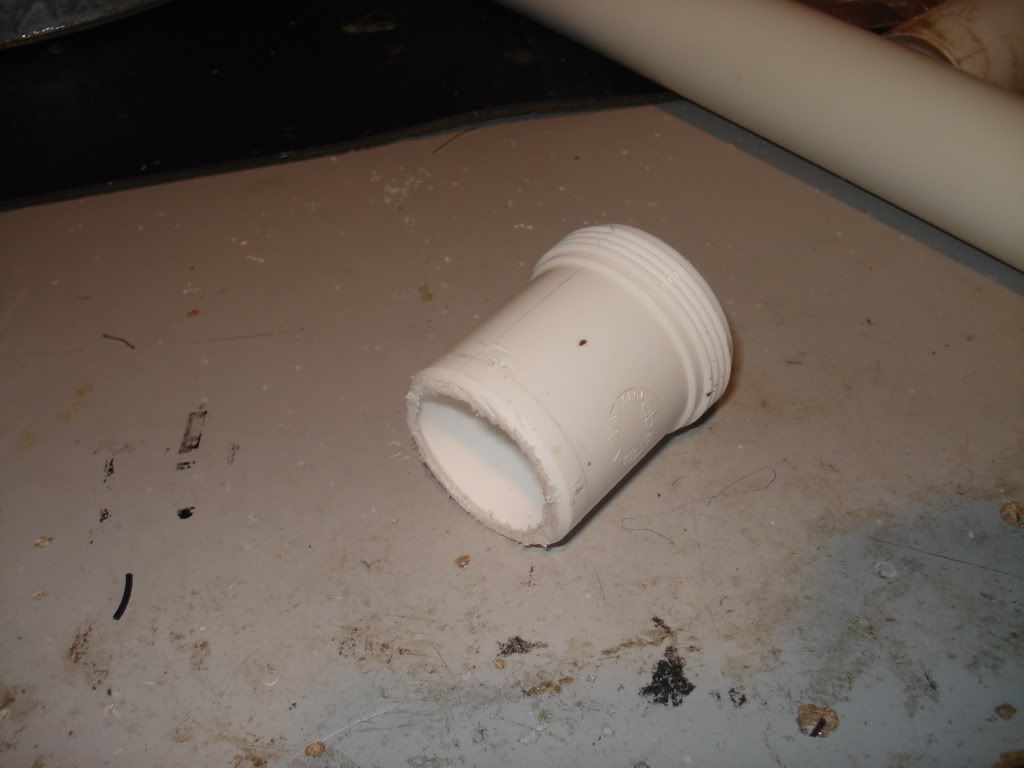
Hotglue that piece that was just cut to the end of a different 17" PVC pipe.
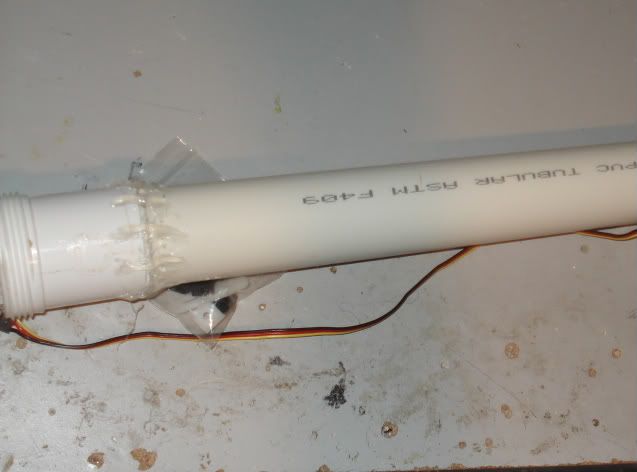
Now take both pieces outside and spray paint them black.After its dry you can attach the gripper to the pipe by just twisting the threaded connector on top of the threaded portion of the long PVC pipe.
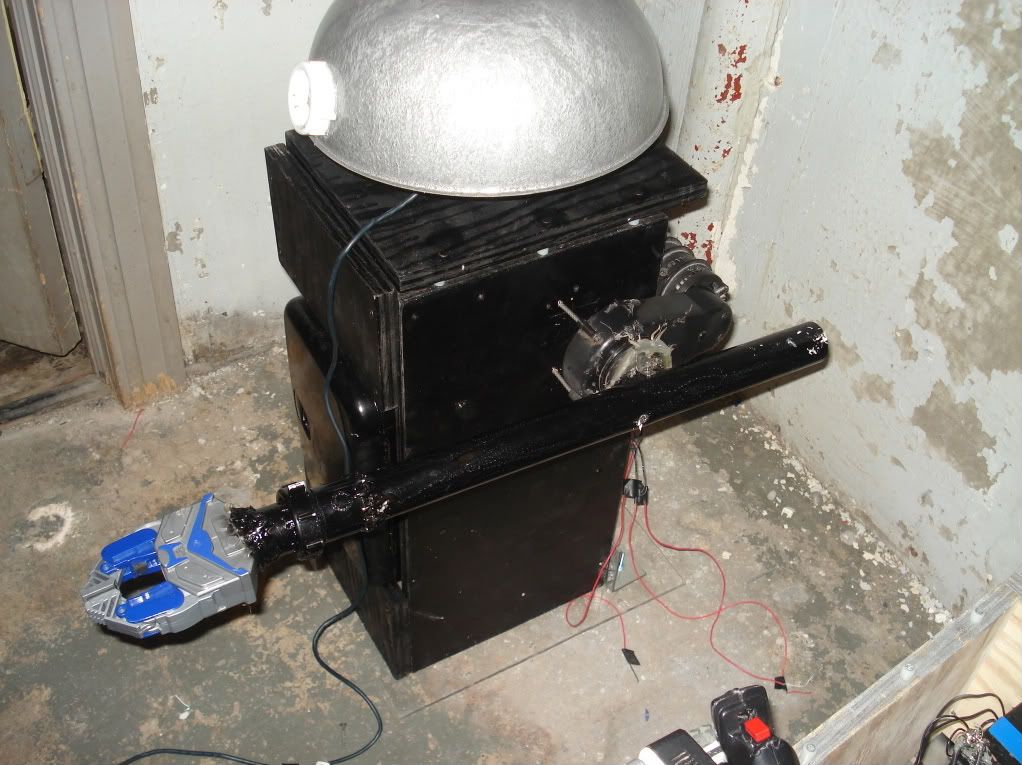
Now take one of the two Power Wheels motors and mount the long PVC pipe of the robot arm to it , using some small L brackets.Use hot glue if you want to secure it more. The small L bracket that I put was 7" from one end and 10" from the end with the gripper.
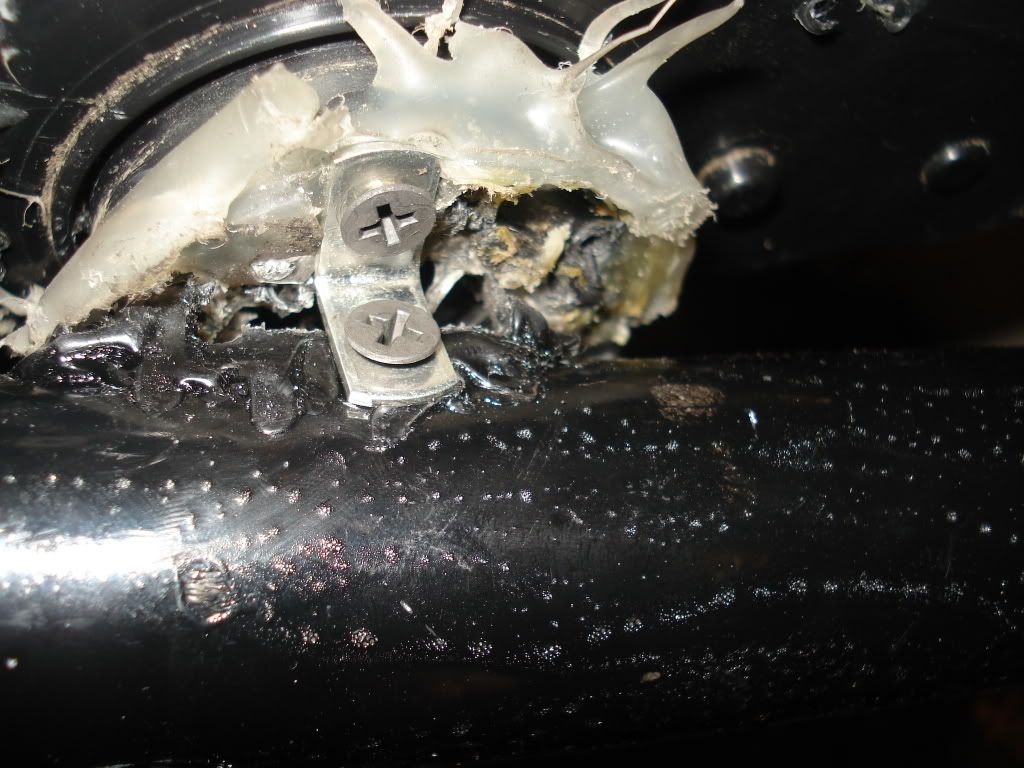
Now attach the motor to the body using two screws.
Your robot should now look like this
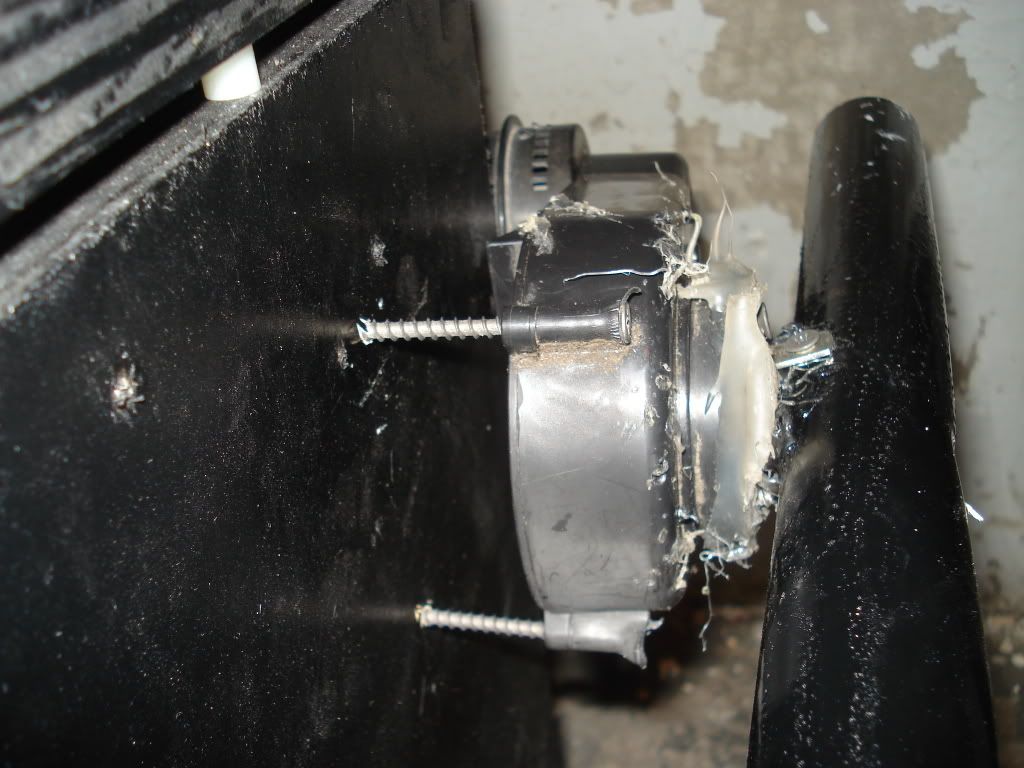
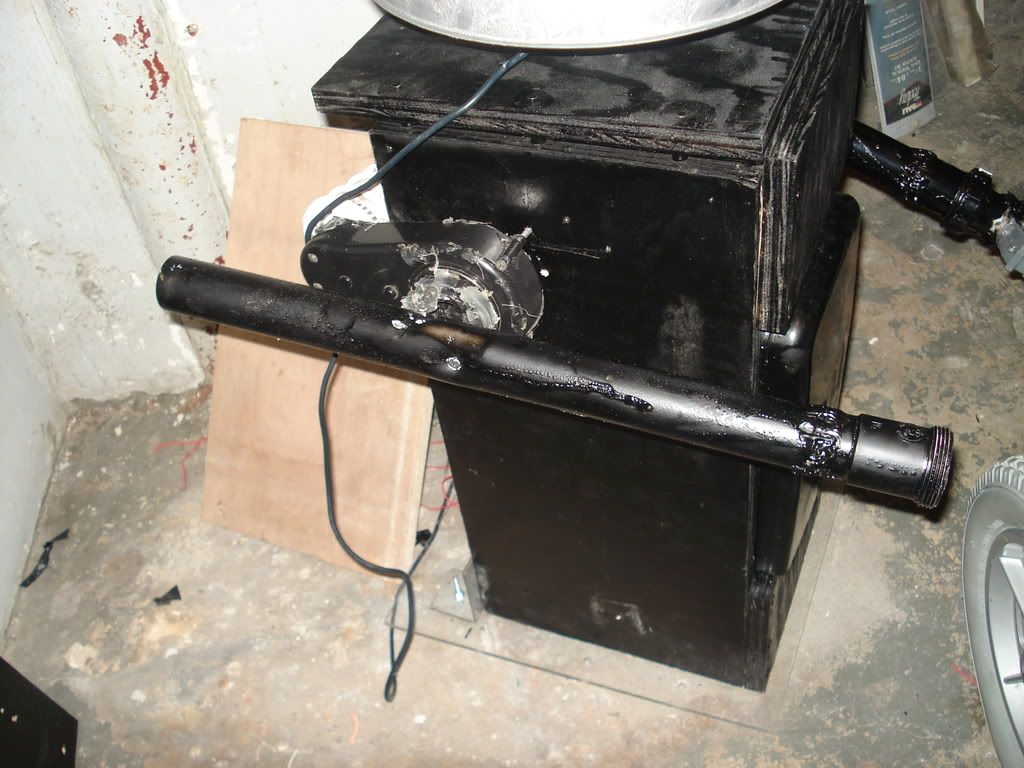
Take another piece of the same 17" PVC pipe and attach a threaded connector.
Spray paint that black and mount it to a motor with two small L brackets(one on top and one on bottom) as we did before to the other arm. Use hotglue if needed to secure the arm.
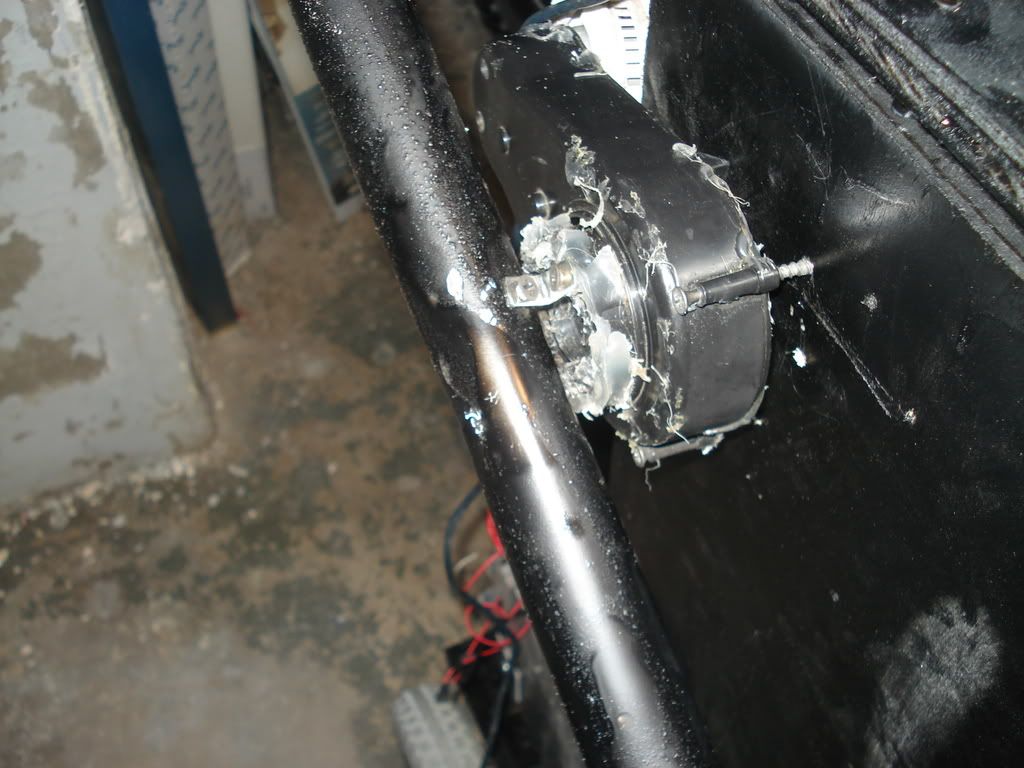
Make sure both arms are secured in place .Here is what you should have so far by the robot's body:
And the back view for those who need it:
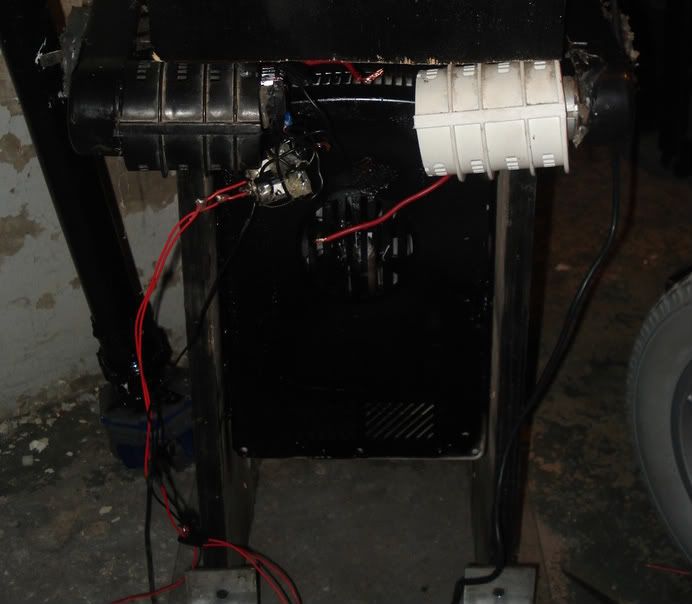
There should be two wires coming from each motors. Connect the red wires from each of the motors and connect those red wires to the positive terminal of the 6V battery pack.
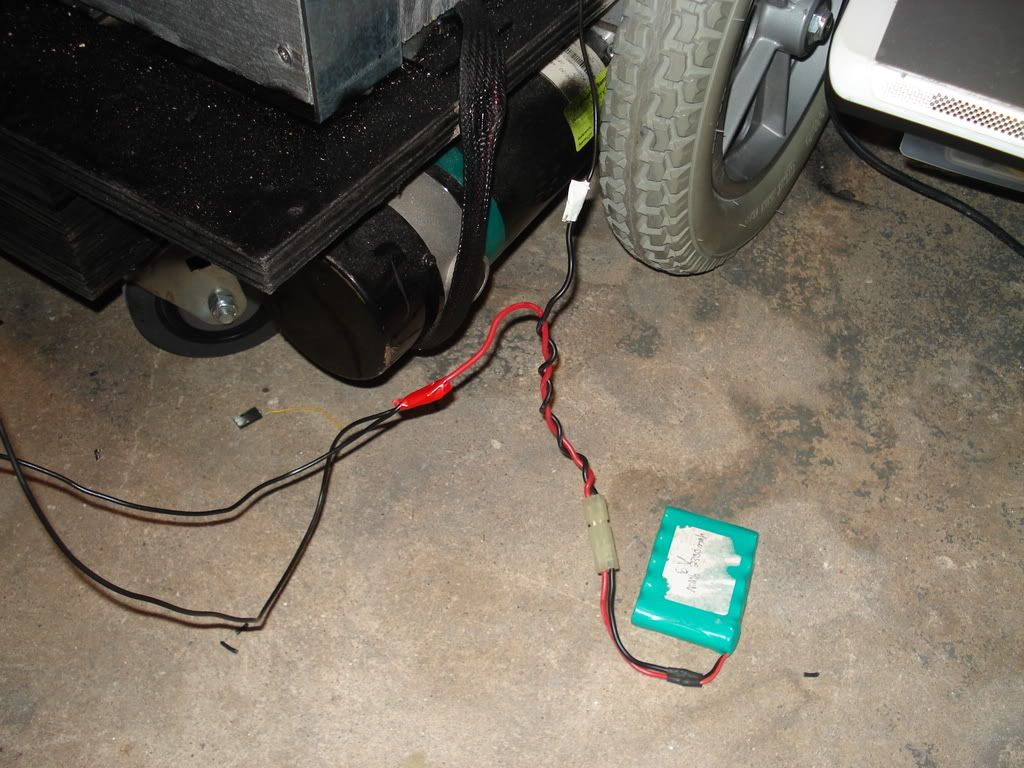
Connect the Negative terminal of that 6V battery to the negative of the 12V battery ( which is common ground) then connect the black wire of the left arm motor to Output #6 , and the black wire of the right arm motor to Output #7.
Solder on wires to the existing wires connected to the gripper and connect the red wire to the positive terminal of the 6V battery and the black wire to output #15.
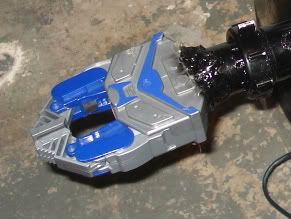
Open up the servo and solder on longer wires to the motor terminals. ( the red and black wires pictured)
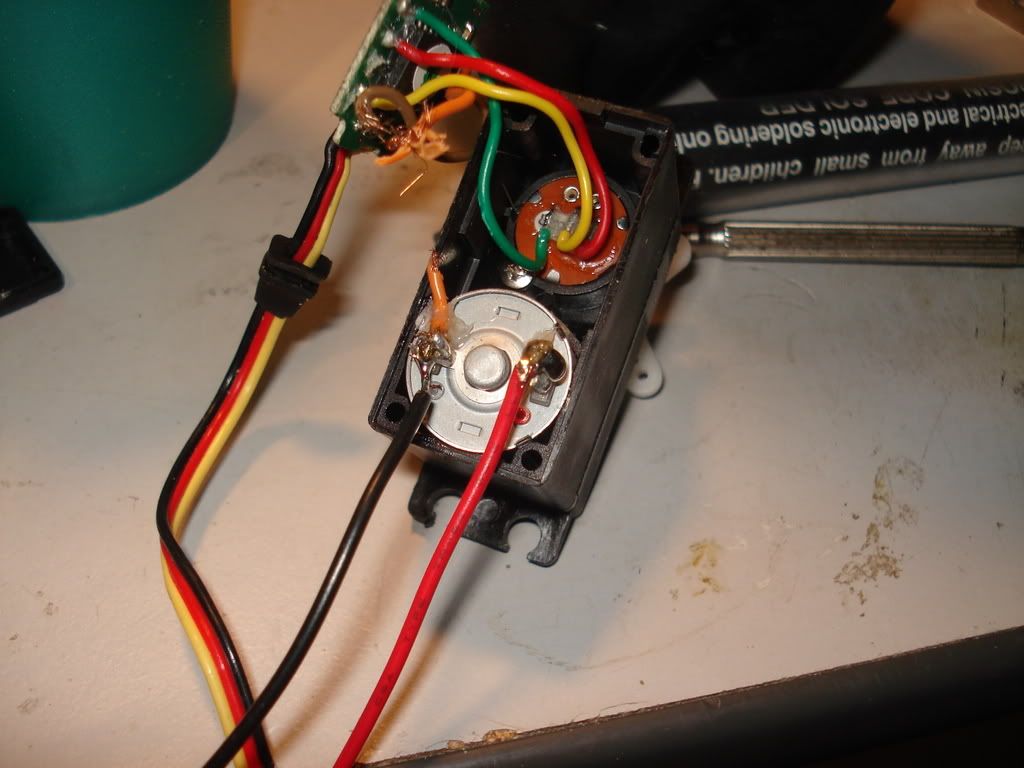
Attach the connector featured to the servo
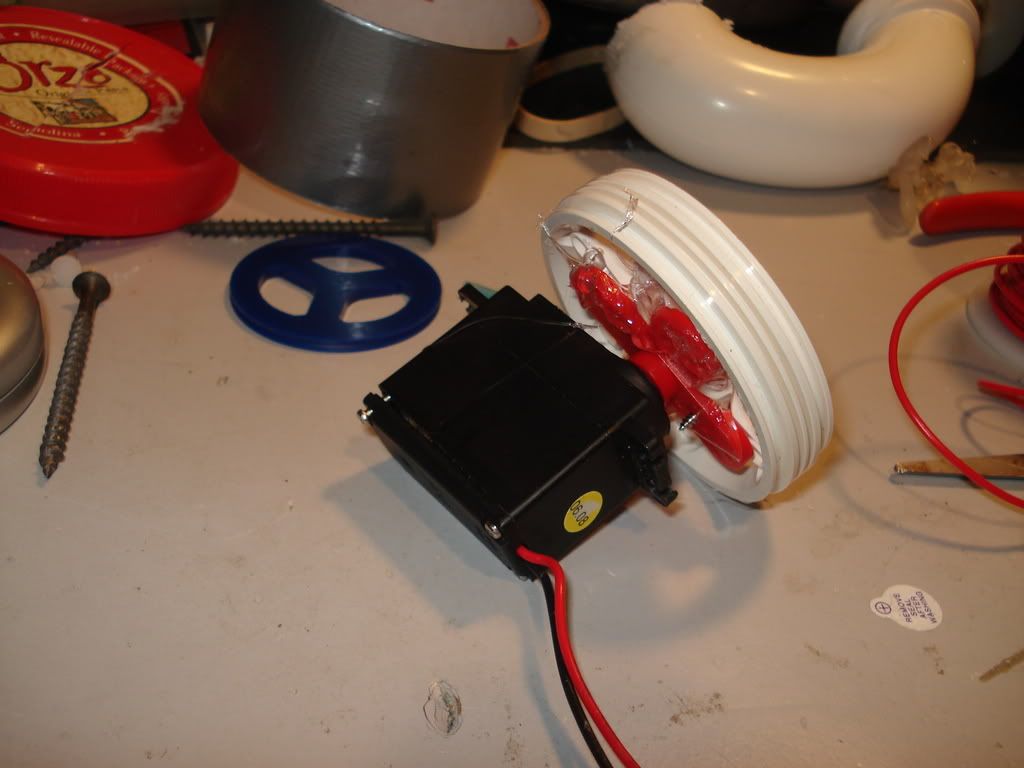
Attach the servo connector to the pipe connector and tighten them together.Then mount the servo the PVC pipe arm of the right arm using screws or hotglue.
Hotglue the motorized wheel to the bottle holder on an angle so that the wheel brushes against the cap of the bottle.
Solder on longer wires to the motorized wheel . Connect the red wires of both the servo motor and the motorized wheel to the positive terminal of the 6V batttery. Connect the black wire of the servo to Output #8 of the Phidgets. The black wire of the motorized wheel should be connected to Output #9.A cup can be attached on a L bracket if you want to add one.
Everything should be wired up now and now you should clean up the wires - that means tape them up, wire tie them , etc. Just make it less messy to work with. Heres what you should have :
Subscribe to:
Posts (Atom)